Showing posts with label Cozy Crafts Corner. Show all posts

Wednesday, June 4, 2025

Being Self-Taught Can Be A Hard Thing, But A Good Thing...


Living From Glory To Glory, Laura Ashley Pattern

Self- Taught in just about everything!
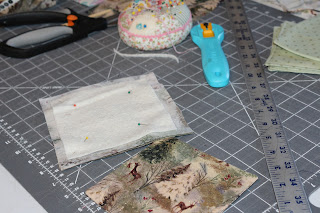
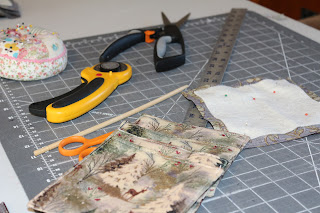
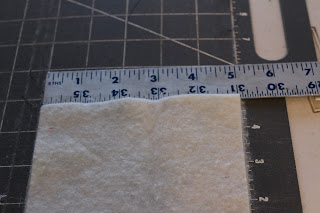
I am going to make this pattern in a mock first using
A nice cotton muslin fabric first!
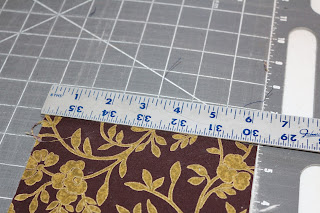
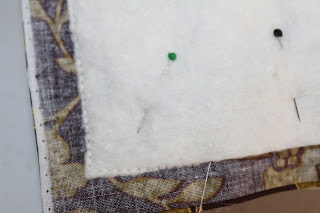
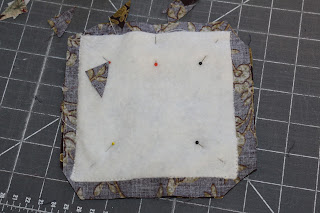
Before I start cutting out the pattern on the pretty
fabric I purchased for this Laura Ashley pattern!


Singer Seweing Machine, Living From Glory To Glory Blog

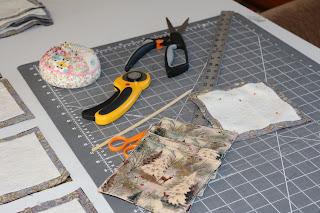
I've had this sewing machine forever,

Nothing fancy but it's strong and reliable!

Being self-taught is a bit of a challenge!

I think we have stopped handing down many things

To the next generation!

Rag Rugs, Living From Glory To Glory Blog...


Over the years I have told myself, you can do this!
Now, grant you I may be in the category 
"Jack of all trades and master of none"

But it has not stopped me from trying and learning!

I bought a beautiful piano and I'm still trying to teach myself.
I have had two different teachers that both lasted maybe a month.

I've taken watercolor painting classes in person and online.

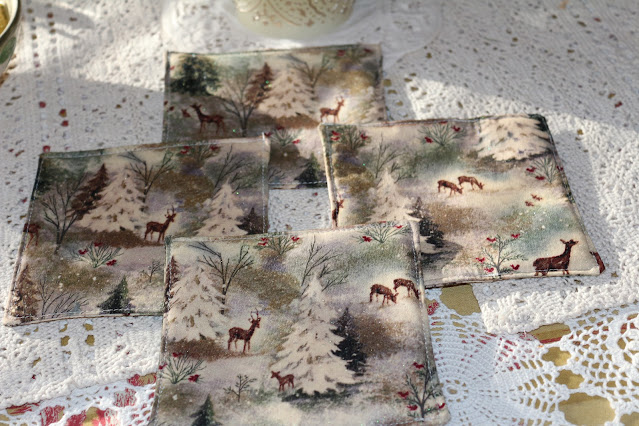
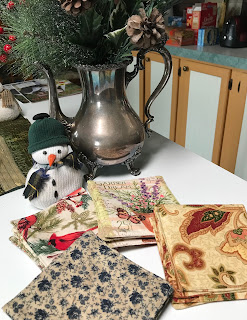
I have been doing some sewing again after 30 years;
Sewing up some cotton jumpers!
The patterns might as well be written in Japanese!
Even the pictures are confusing?!#

But, the point I am trying to make is this;
We can learn new things without an instructor or teacher!
Mind you it would be nice to have some help.
But, in reality no one has time anymore.

One thing we have are helpful videos on the internet!
We can order books to teach ourselves!

Never stop short of learning a new skill;
Or advancing to a new level!
And remember it is so good for our brains too
Learn new skills and to follow directions.

I was not born with natural abilities in sewing or painting
But I didn't let it stop me from trying...

And we can help someone else to just try to learn
A new hobby or craft!
Share what you have learned!

I have this memory of my Mother teaching herself;
Of many things knitting, sewing, canning!
But while she was still here, I failed to learn from her
As much as I should have.

May we always be teachable of the things of the Lord.
But yet not afraid to dig deep into His Word all by ourselves.

Never stop creating beauty in your heart and your home!


Oh, I forgot to mention the one crafty thing that I have just
Had a ball doing, and it's called "Junk Journaling"
It's so much fun and relaxing!
I need to do a little post on this craft very soon!


Junk Journaling Photo, Living From Glory To Glory Blog...


What is a craft or project you have learned or taught yourself??


Sewing, Living From Glory To Glory Blog...

Blessings, Roxy

Monday, November 14, 2022

How To Do Ribbon Embroidery And A Little Note...


~Ribbon Embroidery~


I was so happy and excited to learn this really easy and fun way to do embroidery.
It is very forgiving in the way it covers and fills in.
I started with some muslin fabric and some ribbons of lovely colors that are a bit thin.
 You will be able to tell quickly, which size needle goes through the fabric.
 And also a large eye needle
 And for convenience, I bought some iron on transfers of some pretty flowers.

You will really enjoy this and it makes some very pretty gift ideas.


After I was finished embroidering, 
I gave it a  finished look by sewing on some lace trimming!
Now, I have a lovely handmade doily...


Dear Readers,
 As we can all see things are a bit unsettling.
So now more than ever we must focus on our homes!

Set your hand to projects that will bring you peace for a little
while each day. This will help balance out your heart and mind!

This is the time of year to buy many items in surplus because
of holiday cooking. Look for those deals and put them back.
We need to keep a deep pantry with this economy!

Look through and find things you can repurpose to decorate!

Wash all those warm throws for keeping warm and cozy this winter!

Make small amounts of soups to enjoy for dinner!

Pull out your winter jackets and wash them to freshen them up!

Buy some shoe polish and make your shoes look brand new!

Be wise and put as much back as you can;
Because you could be paying much more very soon!

Clean out your cupboards and organize!

If you can, buy a food saver with the jar attachment,
For keeping dry foods fresher longer!

Don't neglect reading the Word!

Keep taking care of yourself...

~Do not allow the spirit of heaviness to enter your home~

Please know how much we all need one another!
Encourage each other
Love your family
Love your Home

Hugs, Roxy


Thursday, January 27, 2022

How To Make Fabric Coasters For Your Home...


I Have enjoyed Using These Homemade Coasters...


Sometimes we just need a new idea for using up extra fabric!

How I made My Fabric Coasters

Here Is The Blog Post With The How To Video

Click For Video Link


I was thinking about how popular coasters use to be!

And the reasons we used coaster!

We used them on our coffee tables and end table so we

Did not ruin or damage our furniture!

I have also had someone put either a hot beverage and literally ruin the wood.

And if you put a cold beverage on top of a magazine it will sweat and leave a 

Ring that does not go away and can ruin the cover of your magazine.

And it's not I am super picky, it's just that when I get a lovely magazine;

And it gets ruined and it no longer looks inviting to read (smiles)


This is a great sewing project to use up some of your smaller
Pieces of fabric!
Or you only have to purchase a small amount;
You can decide to make only a set of two or as many as you want!
I like them because they are not very high wear a cup or glass can tip off!


Here are some of the things I used to make mine!
I also added the video to help!

My goal was to make some for every season!
I made some to give to my family and friends.
They really make lovely gifts...
These are also a very Frugal Gift Idea You can Make!


Cut out the fabric out in the size of 6x6


Cut your batting out the size of 5x5
You can use a thin batting or slightly thicker.


Use your straight pins to secure batting to the fabric,
Pin each corner and leave an opening to turn it inside out
Once it is completely finished!
Now you will sew all around the batting!
Remember to stay straight and even;
Because this will determine the shape of the square!


Once you finish sewing all the way around;

(Keep and inch opened for turning it inside out)

You will trim off the excess on the corners so it is not bulky!


Sew straight, Leave an opening to turn, Cut off excess tips!


I usually cut out the fabric and batting to size,
And place batting in the center and pin them on.
And I leave two pins straight up and down to remind me
To not close up the opening for turning it!
Then when I have them all pinned and ready I will start sewing them!


I took a photo of a few of the different ones I have made!

I do hope this will inspire you to try your hand at making

Something for your home!

Sewing

Cooking

Baking

All things BEAUTIFUL...

Blessings, Roxy


Thursday, January 28, 2021

How To Sew Little Hearts ...


Sewing Little Hearts, Living From Glory To Glory Blog...

A Little Sewing Makes The Heart Happy

Wanted to share a little craft you can make and give throughout the year!

This craft is super easy and inexpensive.
Using up little scraps of fabric is a great way to be frugal.

I like making these so they are available so
 I can tuck them into any packages to my friends or family!
A little added bonus that they can remember me by.
Plus they look so cute, and you can hang them anywhere!

All you need is
 A heart shape pattern you cut out
Scraps of fabric, or you can buy what you really like
Scissors
Fiberfill for the stuffing
Ribbon or lace for hanger
Little ribbon flowers or buttons
Glue for adding flowers or buttons


I did sew mine on my sewing machine,
 But you could sew it also by hand!

You could also make these out of felt material,
And you would do a stitching by hand around it.

So cut out your pattern
Pin the pattern onto the material
Cut heart out.

Sew both pieces right side out, but leave a little gap to add your stuffing!
(Don't fill it really full)
Sew up the little gap

Now hand sew on your lace hanger or ribbon
Glue on a button or flower.
Ta Da
You now have a heart to keep or give away!

Keeping a small project to work on can help you stay creative;
And keeps your hands busy!

I like to pray while working on these kinds of projects,
They can inspire you and keeps you calm.

I have always loved seeing pictures of a homemaker sitting
In a chair and working on a sewing project.

Find peace and joy in the small things!

Blessings, Roxy

~Let me know if you try this sweet little craft sometime~


Friday, March 27, 2020

Pattern For Making Face Masks...


Making Facemasks to protect yourself, Living From Glory To Glory Blog


~Here is a short video clip to watch~


Hello Everyone
I have been making face masks for 2 weeks now!
I have completely run out of elastic, so I have
Improvised, adapt and overcome!
(Did Clint Eastwood say this?)

You can't even order this online
(Out Of Stock)

I have shared a few links for making these;
Also an interesting topic of the better material or fabric to use!

Pattern for making Face Masks
Face Mask Patterns PDF
PDF Pattern


Also wanted to share another Face Mask Video
DIY Face Mask With Filter Pocket


I made myself two of this style"
You have a little pocket so you can add a coffee filter or paper towel;
For added protection...

Click Below;
Best Materials For Making DIY Facemasks

I personally believe this is real and not a conspiracy theory.

Once again, lets fight over everything
And let's agree everyone is wrong;
(Accept Yourself)

So please stop your anti- everything for just once!
Political nonsense...

Don't be in fear, just stay home and stop spreading this virus;
You may show NO symptoms, but be a carrier!

Do what you think is right!!
Don't be a naysayer!

Stupid is as stupid does!!
(Forest Gump)

Hugs, Roxy

Saturday, February 8, 2020

An Easy Valentines Craft And A few Thoughts On Flying Apperance's...


Valentine Banner, Living From Glory To Glory Blog...

Hello, Can you believe we are celebrating another lovely holiday?
I wanted to share these sweet heart banner that I made years ago and,
It is still one of my very favorite banners!
When its over I place it in a drawer of my china hutch for the next year!


I just could not help myself in saying maybe too much on how my
Flying experience went last month!
But, It just helps me to be mindful of how I look when I am
Out in the world!

Vintage Looking Banner, Living From Glory To glory Blog...

Here is my homemade heart banner!


Heart Patterns, Living From Glory To Glory Blog...

Make a few different patterns of size and shapes of hearts!
Fat and wide or long and skinny...

Scrapbooking Paper, Living From Glory To Glory Blog...

Use some pretty scrapbooking paper, of colors and design you really like!
There are so many beautiful colors to choose from!

Once you cut out the hearts place them in the pattern you choose;
Now, slowly line them up on your sewing machine;
Leave a long tail of thread and sew them evenly apart!
I like to sew the hearts almost into the middle of each heart,
This way they lay nicely!
Then also leave a long ending tail of thread, as you use these strings
To hang them over a window or a china hutch or a mantel or just on a wall!


I do want to say may you take this time and share your love;
And creativity and always try to look your best!
Make and Bake something for those you LOVE...

As Always, Hugs and striving to remind myself;
Living From Glory To Glory...
~For His Glory~

Monday, February 3, 2020

How To Make Fabric Coasters With Video Clip Directions...


How To Make Fabric Coasters, Living From Glory To Glory Blog...

These coasters are made from a Pioneer Woman table cloth,
I just cut the excess fabric off as it was too long for my table.


Living From Glory To Glory Blog...
Batting for Coasters, Living From Glory To Glory Blog...


Measure fabric 6x6
Measure Batting 5x5


Material Needed
1/2 yard material of your choice
1/2 yard of Batting 100% cotton
Yardstick
Scissors
Needles for pinning
Sewing machine
Scotch Guard Spray
Remember you can cut the material with scissors or use a mat board
With a Rotary Cutter.

Start this project, by cutting your fabric and batting
Fabric  cut the square's  6x6
Batting, cut the squares 5x5

Now, Place the fabric squares right sides together;
Then place batting in the center of fabric and sew around the edges of batting material.
Try to catch the batting material as you sew,
As it will make it easier when you turn it right sides out!
Leave a little 1 inch opening so you can turn it right sides out.
Remember to use a thread that matches your fabric.

Tip: Make sure to cut off the tip of each corner after sewing the,
Batting on, as it makes it less bulky when turning.
Tip: Also iron the squares after you turn them inside out!
Then go around each one for a final stitch;
(Remember to backstitch so they stay securely together.

I like using a mat because I can have very straight lines
 And it protects the sewing surface.

You can make a different design for all sorts of holidays or special occasions!

I have made many sets for myself, and some for my friends!
It is also a very frugal gift to make with very little fabric;
A great craft to use up all those smaller bits of material.

I do hope you will try this sweet little craft. It is fun and makes such a nice gift.

May you all enjoy this month of February and make your home cozy and warm!

As Always,
Living From Glory To Glory

Hugs, Roxy


Tuesday, November 27, 2018

How To Make Dish Cloths Made From A Drop Cloth...


This is an easy and inexpensive hand towel you can make;
 for yourself or as a gift for others!
I did both, because using a drop cloth allows you so much more fabric!

Firstly, I purchased a new drop cloth and washed and dried it!
This was the brand I bought from a local hardware store!
As you can see it is a very large size of material!
And is 100% Cotton
It is a very soft cotton and very sturdy.


After the Drop Cloth was washed and dried, I then began cutting out,
my hand towels, using a size I liked from a kitchen towel I had.

I cut so many out, I truly cannot remember how many I got from that one drop cloth.
One drop cloth I think was around ten dollars!

As you can see once they were ironed and hemmed each side,
 I sewed on a piece of fabric and,
added a bit of sturdy lace to them also!

I was able to use scrap material to embellish them and added bits of trim.

I did make these in an assembly line fashion as it made it go quite fast!
I also had a dear friend come over to make a few for herself and some gifts.
Everyone loved these hand towels as they were soft, sturdy absorbent!

Not to mention very pretty and unique and useful!

All I can say is if you need a lot of fabric for cheap for a craft idea or
a home project. Is to look into purchasing and using a drop cloth!

You can make reusable gift bags!
You can make curtains!
You can make dusting cloths!
You can make Burp Cloths!

There are many ideas out there, that require an inexpensive, and sturdy fabric!

Try this and I think you will be pleasantly surprised!

Blessings To You Dear Ones!

Hugs, Roxy


Thursday, June 14, 2018

How To Decorate A Miniature Doll House...


A Minature Doll House, Living From Glory To Glory Blog...

Here is the doll house I worked on all last spring!
It was a doll house already constructed;
My daughter found it on Craig's list for me, now that was such
a nice and easy way to start my project to decorate it for the State Fair!

It was a pretty blue color, but was faded and and some yellowing.
I felt that I was more of a yellow color kinda gal,
especially for a Victorian style home.

A Minature Victorian Doll House, Living From Glory To Glory Blog


The cost of this doll house was only thirty dollars,
I truly felt I had found the bargain I was hoping for!
$$
Because, I first went to Hobby Lobby and brought home
a very large box filled with a zillion pieces...
My son told me this;
"Mother this will only take you maybe 300 hours to construct and paint!"

I looked at him and said your kidding right?
Well needless to say I closed that huge box up and
returned it to Hobby Lobby.


Minature Doll House, Living from glory to glory blog...

It took over three coats of paint to cover the faded and dulled blue color.
I primed it inside and out, then painted the outside a pretty yellow.

I also had to paint the inside with primer and still three coats of a beige color.


Decorating the kitchen was so much fun!
Cherry curtains and sweet place mats and a apron I sewed for it!
Minature Country Doll House Kitchen, Living from Glory To Glory Blog...
I also made a little red rug!

I went to Hobby Lobby every few days buying little kitchen things.
Went to a specialty shop and found some darling treasures.
I also ordered a few things on line.
~Everything Miniture~

My Little Itsy Bitsy Apron


The bedroom was really fun!
loved the little Hope Chest filled with goodies
I made little perfume bottles from glass beads!
Also, I sewed the bedding, a wee comforter blanket and shams.
Pillows and the bed skirt...
Living From Glory To Glory Blog...

This room I used as the office, loved that little Banjo!!!
Everything in the details...
My Granddaughter made me some wee little colored pencils.
Living From Glory To Glory Blog...

And of course I had a sewing room in the attic!
I found a little box with spools of thread,
How adorable is that??
It even has a little ironing board and iron.
Living From Glory To Glory Blog...


Here is the whole layout of the house!
The living room had a fireplace, and of course a kitty and a puppy!
Living From Glory To Glory Blog...

I really enjoyed doing this project!
It was a challenge and took a few months to paint and to decorate!

My grandson said now let me get this straight;
You paid only thirty dollars for it, but what did all the furnishings cost?
"We won't go there"

It was a project I always wanted to do!
I did enter it into the State Fair and I did take 3rd place!
That was really amazing, because you would be surprised at how many
 there were in the minature doll House category!

It was something that brought me great joy;
And taught me that it is in the details;
No matter how small a thing is it can be big...

Now, I am thinking about entering something for this year;
I may or may not, as it all depends if I can get a project started
and completed before next month...
(Me Laughing Hysterically)

I hope you enjoyed seeing my sweet project;
I told my youngest granddaughter she could have it one day!

Sending a hug to each of you out in Blogland...
Love, Living From Glory To Glory


Saturday, January 27, 2018

How To Start Making Your Own Necklaces...

How To Make Your Own Necklaces, Living From Glory To Glory Blog...

Making your own necklaces can be fun and very rewarding!
I am finally posting this post that I have had for a very long time.

But, I have been in the mood to start making necklaces again!
You can make any solid color top or sweater look dressed up;
Simply by adding a colorful necklace!

I have so many of them, and do I really need more
YES...

Here is my spot in my craft room that I use to lay out my beads and tools!

Materials Needed For Making Your Own Jewelry, Living From Glory To Glory Blog...

Have you used or seen these lights, they are amazing?
OTTLIGHT

They make it so easy to see and the colors are true, you can even see in the evenings.

Using a bead board allows you to lay out and design your necklace.
And you are able to make it into the length you desire.
I prefer a longer one myself.
But I like a few to be shorter with just a single pendent!


Here are just a few that I have made!
Hope to have every color of the rainbow...
Make Your Own Necklaces, Living from glory to glory blog...

Because I like turquoise so much, I have made many in that stone!
It is a very rich stone and makes me happy and I think of
My dear hubby's heritage.


Beads, Beads and more Beads
Beads Galore, living from glory to glory blog

When you start buying beads for your necklaces you will be in
Paradise over the colors and the shapes being offered.
Types: metal, stone, glass,wood, pearl.
Shapes: round, ovals, teardrop, nugget, rectangle.

And when Hobby Lobby or your favorite bead store has half off;
You can buy a few extra for the next project!

I like to keep my beads in these little storage boxes;
They keep them neat and organized, and you can see through them.

Buying a nice quality beading wire to use them on is a must!
Being cheap on that note is not a good idea!
Beadalone is a good brand!
And of course a few jewelry tools:
Wire cutters, Crimping tool, round nose pliers,
flat nose pliers, bent chain-nose pliers.
(You can purchase these in a small starter kit)

Using the decorative space beads is a good way to make your
Beads last longer and gives it a little pop.

Most my necklaces will be created around a pendant that I love!
The color the shape and the length.
This is where you get to be artistic and creative.

Making a piece of jewelry is so rewarding!
They also make lovely gifts and pretty keepsakes for yourself.

May I suggest getting yourself a beginner jewelry book;
And look at a few YouTube videos for ideas and how to!

It takes a small investment, but you will love the results.

Some of the beads I use are old ugly necklaces I have run across
From a yard sale or thrift store;
 then I take them apart and re-use the beads
in a new creation!


I keep my eyes opened for a unique pendant;
Then I buy the small seed beads to match and a larger bead,
Adding a small silver, or gold or bronze spacers add dimension.

Necklace Pendents, Living from glory to glory blog...

I am looking forward to making some new necklaces!

I encourage you to look at learning how making your own jewelry!

I think this may be the longest post I have ever written;
~SMILES~


Copyright © living from glory to glory | Powered by Blogger
Design Customized With ❤️️ by My Fairy Blog Mother